

What is Automation?
Automation is performing tasks that do not require to be performed manually or, without human supervision. Automation is used to perform menial, tedious tasks such as taking headcounts or even automating complex processes such as data mining or predicting trends.
To do automation of tasks, UiPath is one of the most user-friendly tools to perform automation tasks on. UiPath is a RPA (Robotic Process Automation) platform which provides solutions for automating a variety of tasks on hand not limited to file handling till automating some processes in Windows. UiPath can also be integrated with other applications to perform Automation tasks. Some of the examples include:
Integrating with Python: UiPath can be integrated with Python to perform Machine Learning based automation tasks.
Integrating with Task Scheduler: UiPath can be integrated with Windows task scheduler to schedule processes in the Windows system.
Automation ranges from automating simple tasks such as filling values based on mathematical formulae or the other to using complex tools and Machine Learning techniques to Automate various tasks.
Advantages of Automation
Automating tasks has a multitude of advantages. Let us look at some of them below:
Cost saving: Costs can be reduced due to the need of hiring less manpower which is done due to Automation.
Time complexity: The time complexity of performing tasks which can be automated reduces the time to perform these tasks significantly due to it being automated.
Higher Accuracy: Due to the Automation of tasks and computer programs, it naturally provides a higher accuracy to the resulting output.
Standardization: Due to automation, processes can be standardized and defined properly with parameters. This comes to play in processes needing highly precise data.
Operate 24/7: Due to processes being automated, it needs no rest. Hence, it can work 24/7 to collect, organize and clean data.
Automation Examples
Example-1: File Handling
Consider an example where you'd like to automate moving files from one folder to another. UiPath has a dedicated file handling module to do so. Let's see how to move files from one folder to another below:
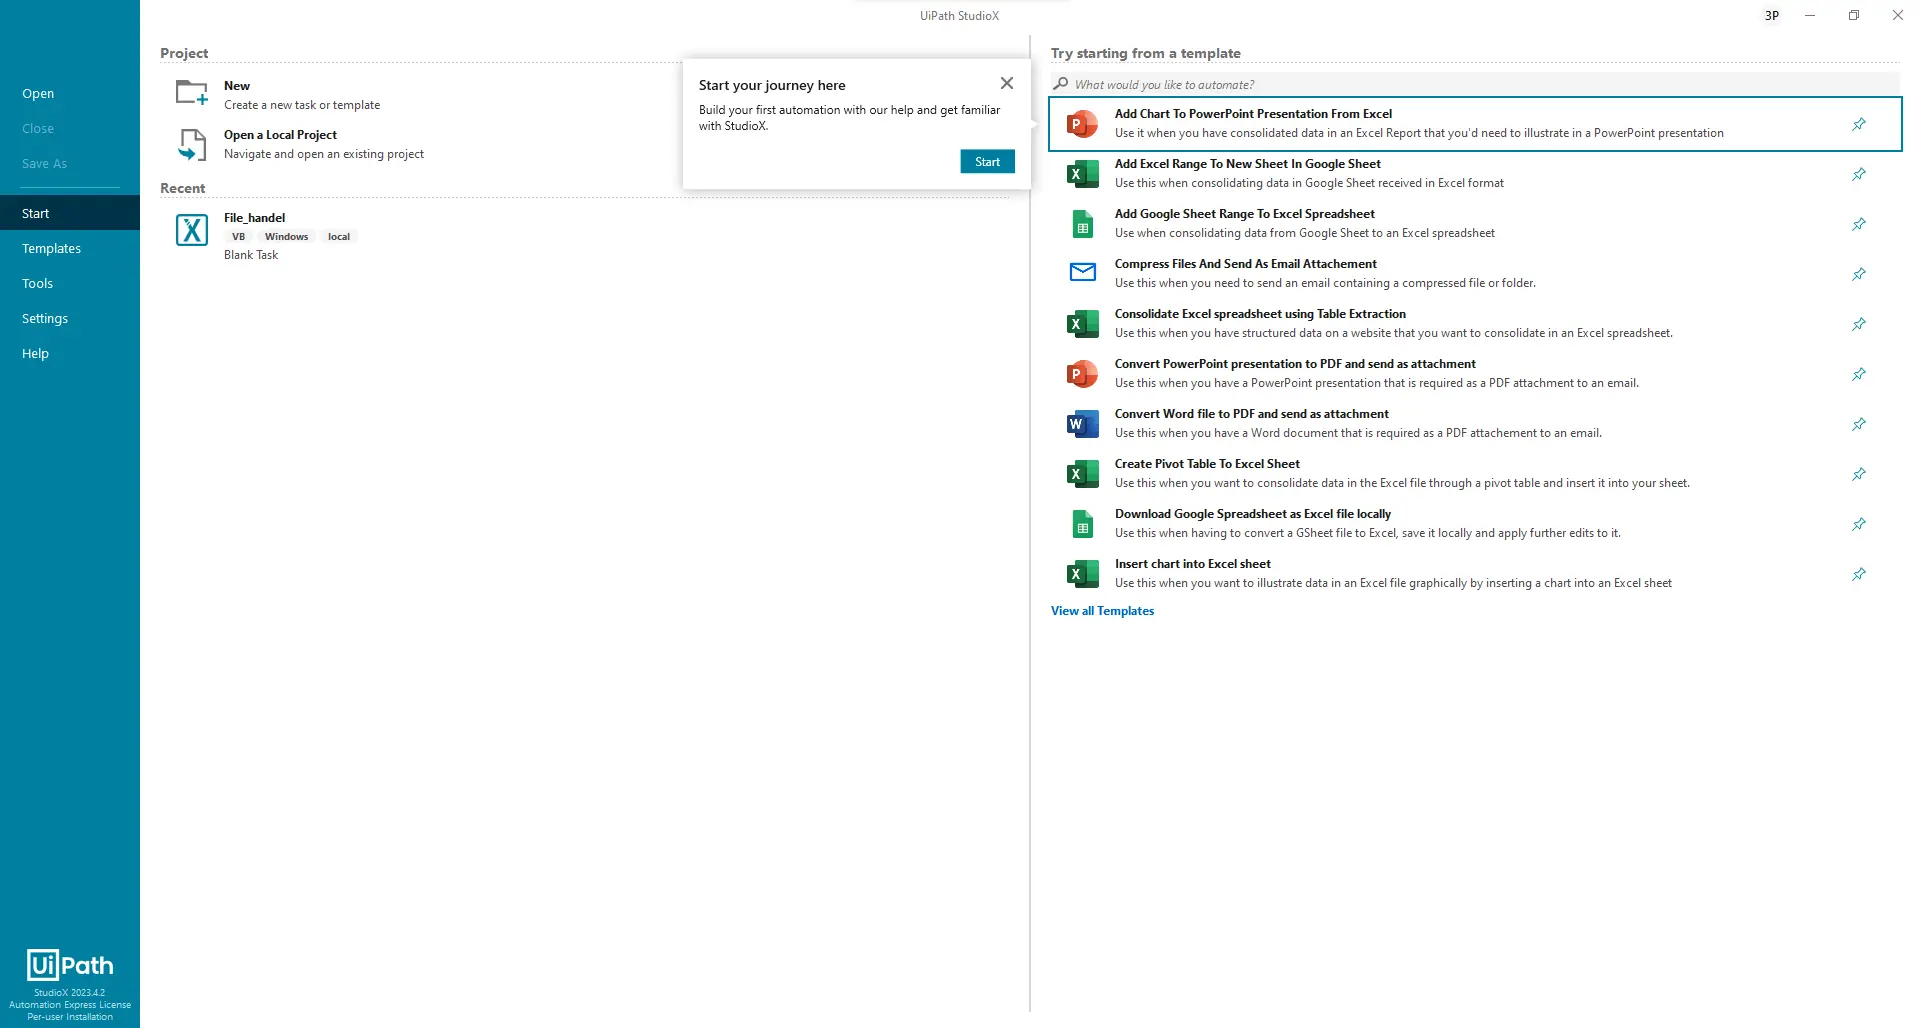
Step 1: Log in to the UiPath website. Then download the studio for free. You will get a free trial for 60 days for personal use. You can also use the Studio available on the website, but here, we’ll see how to do it in the UiPath Studio app downloaded in the system.
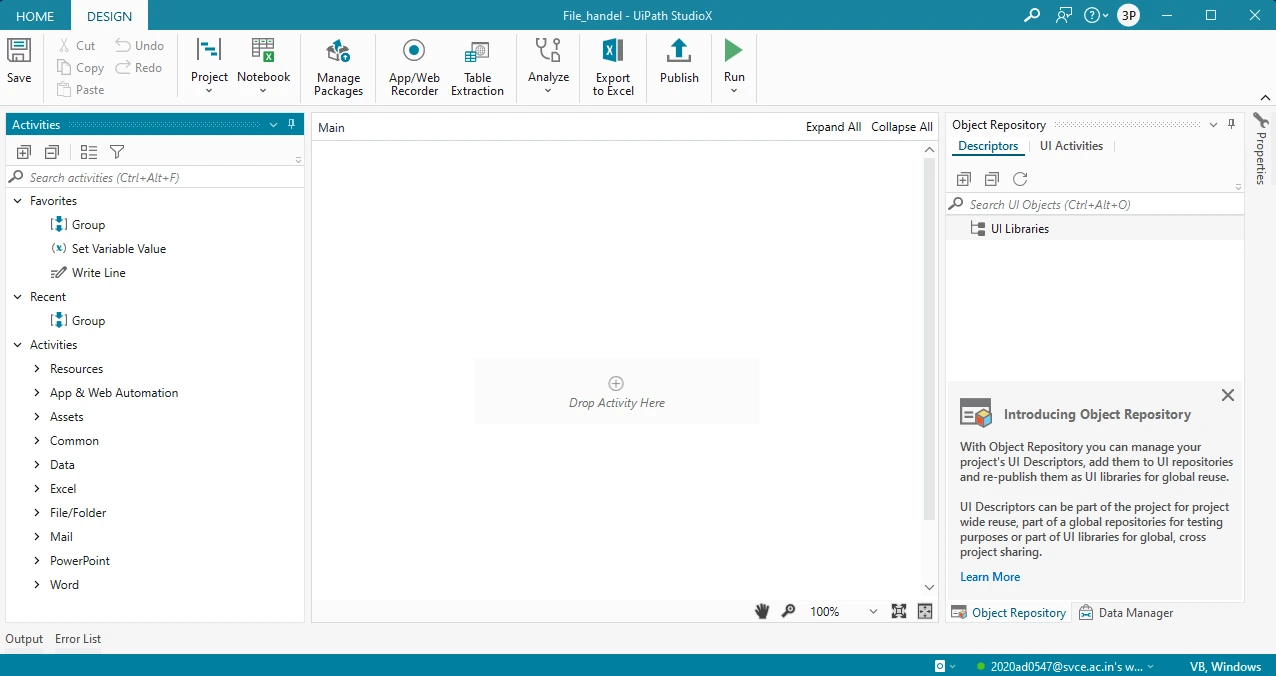
Step 2: Open the Studio on your Desktop and open a new project. The interface looks like this.
Step 3: To create a file-handling system. Consider an example where you want to move all your files to one folder.
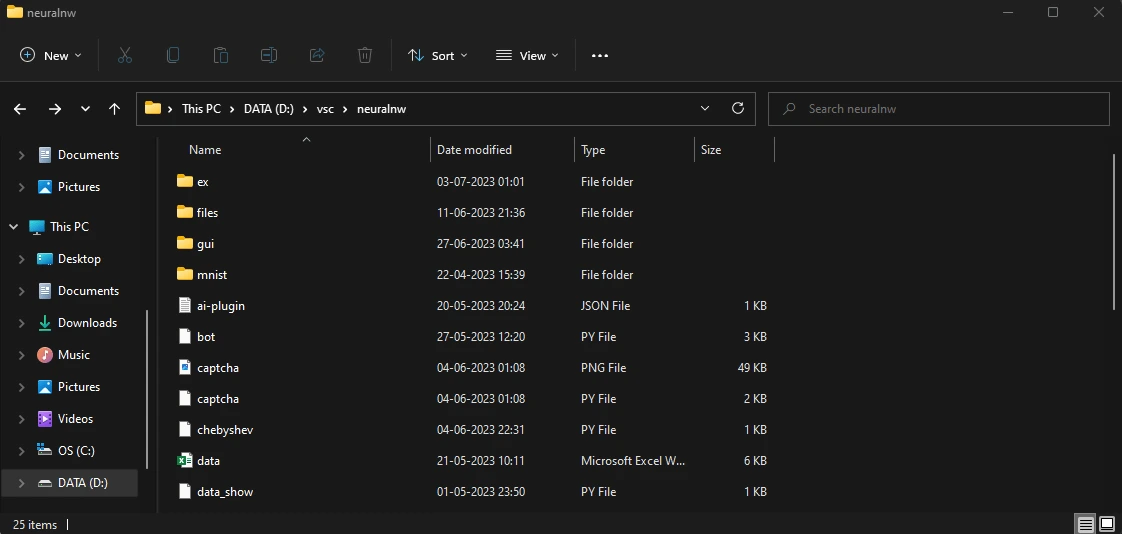
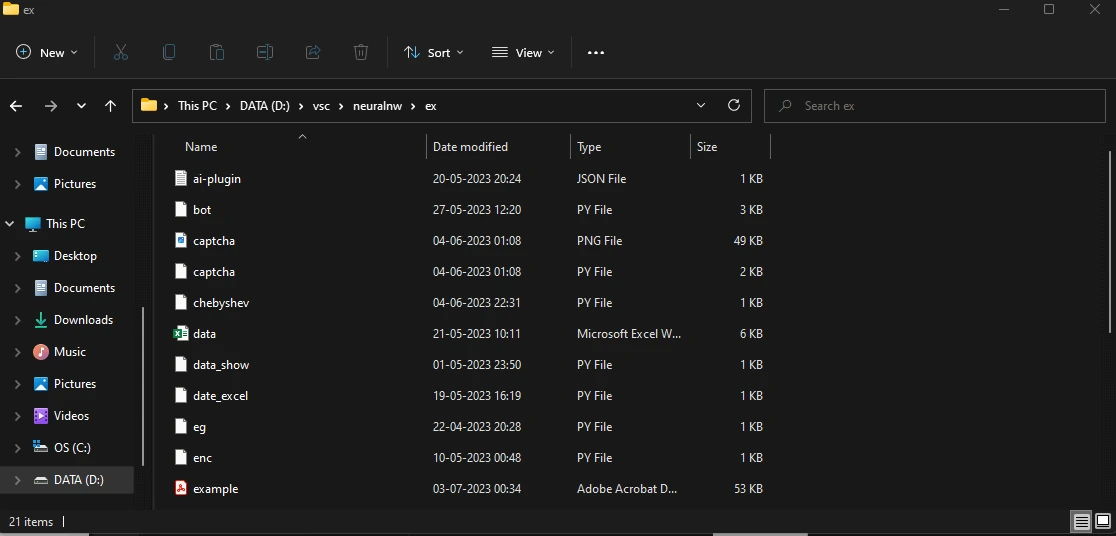
Here, we need to move all the files to the “ex” folder. Let's see how to do that.
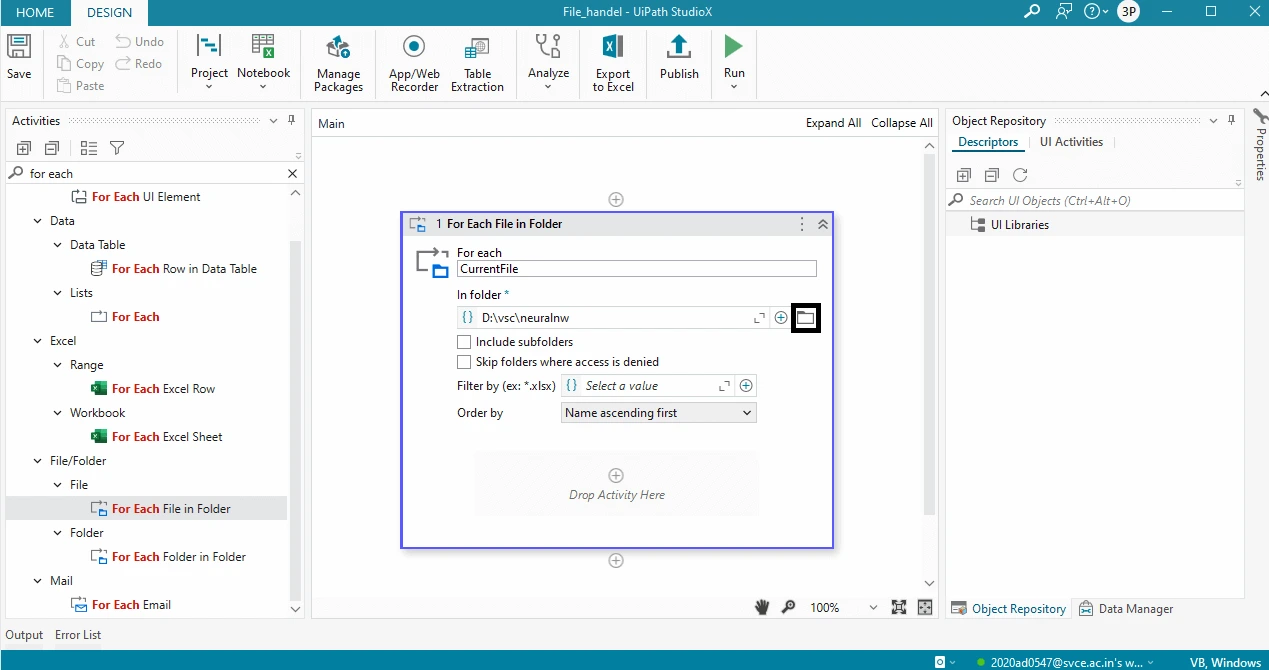
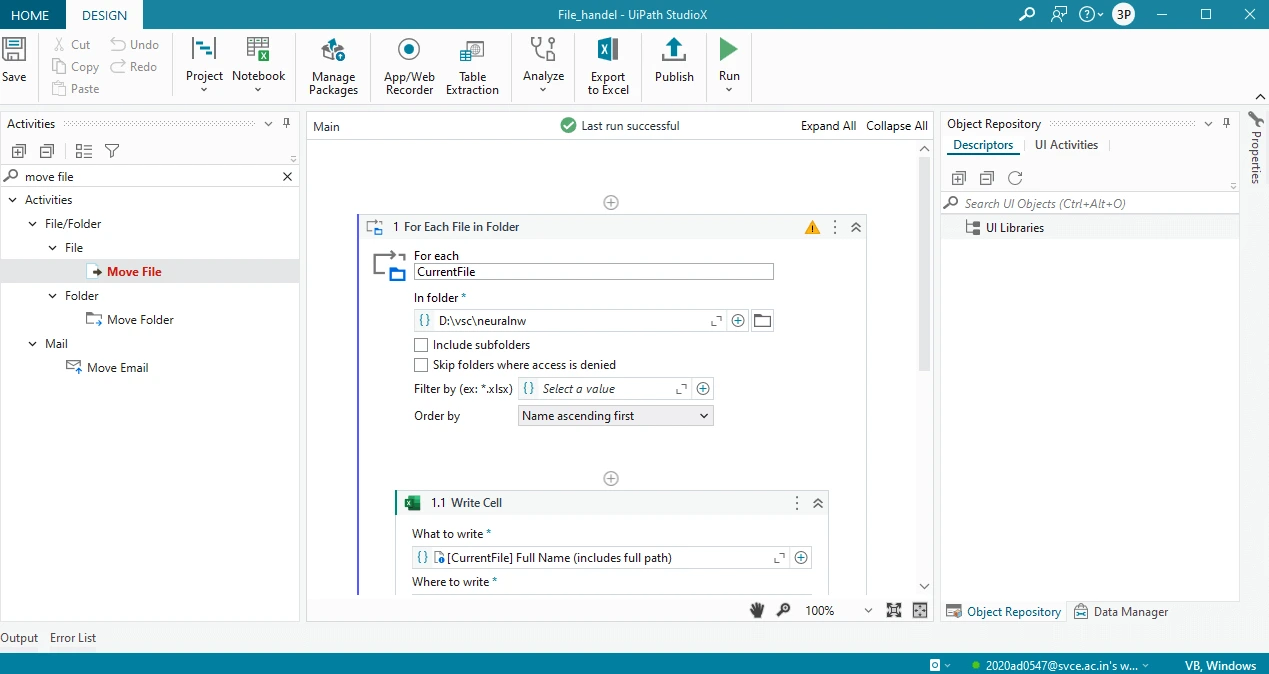
Drag and drop For each in the activity box. This can be done by searching for it.

Choose the required directory you want the file automation processes to begin with.
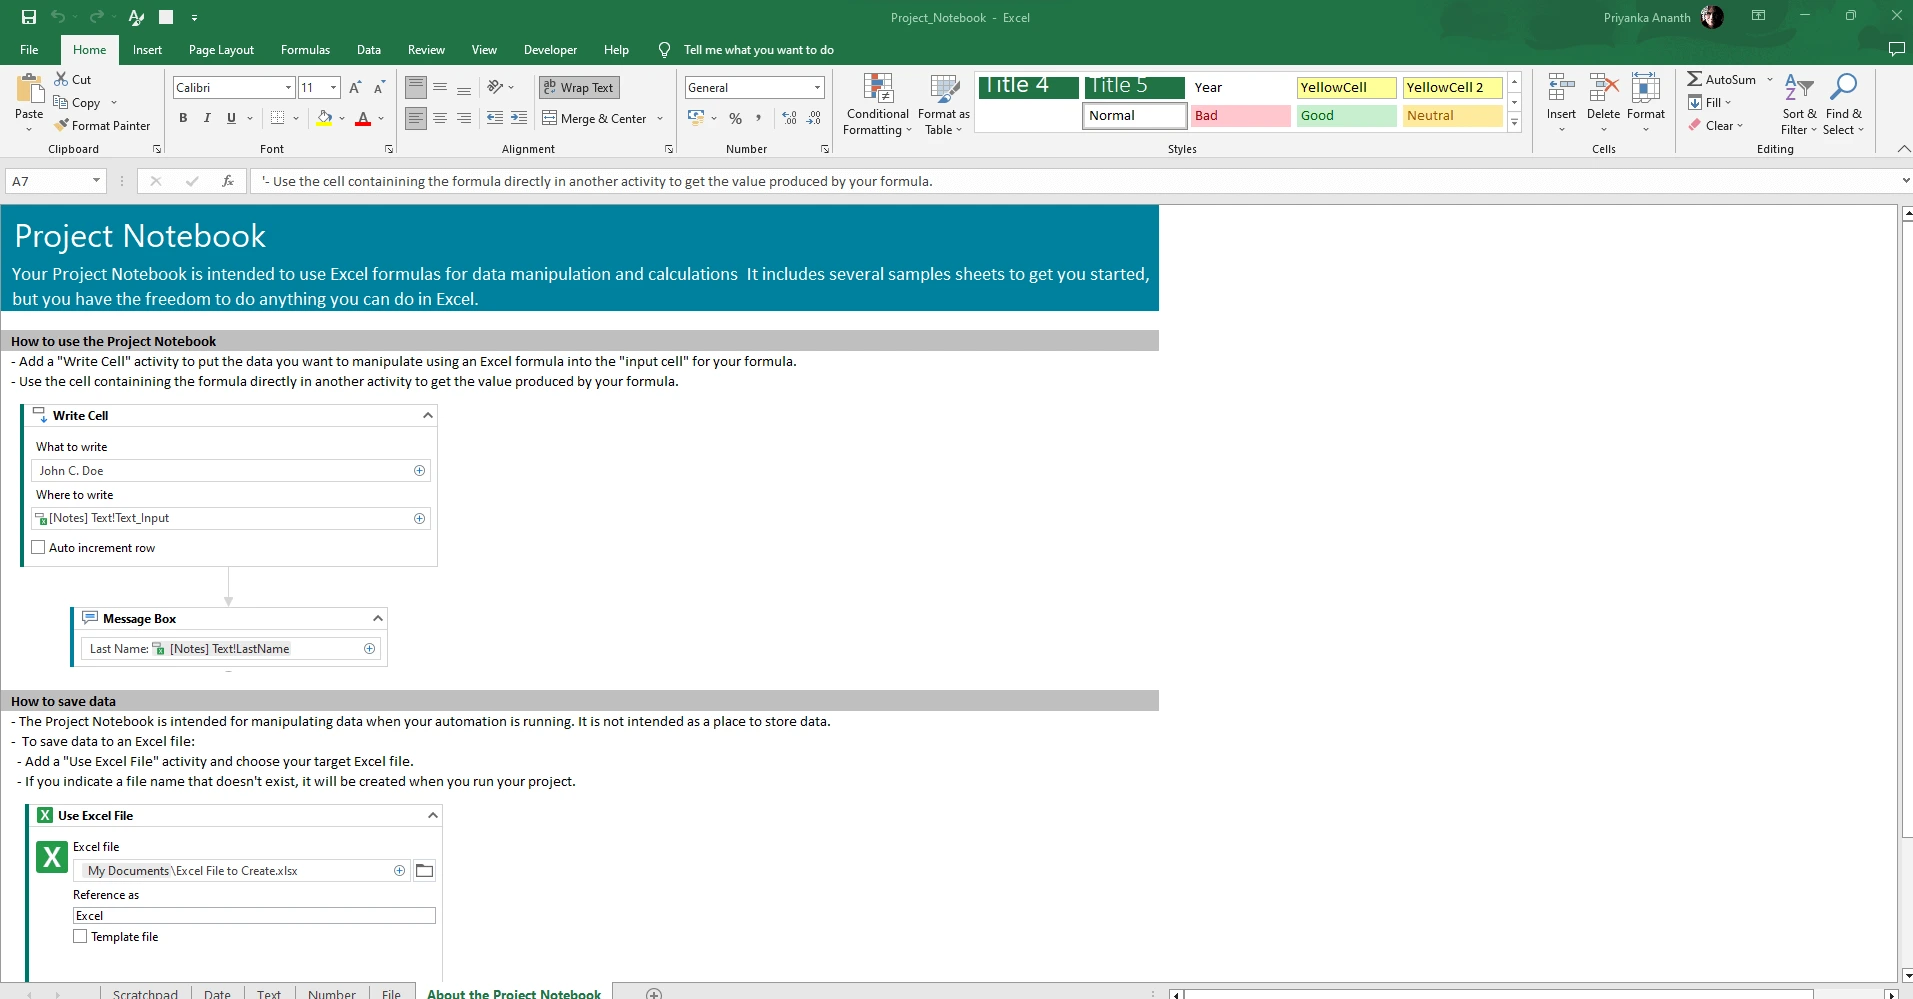
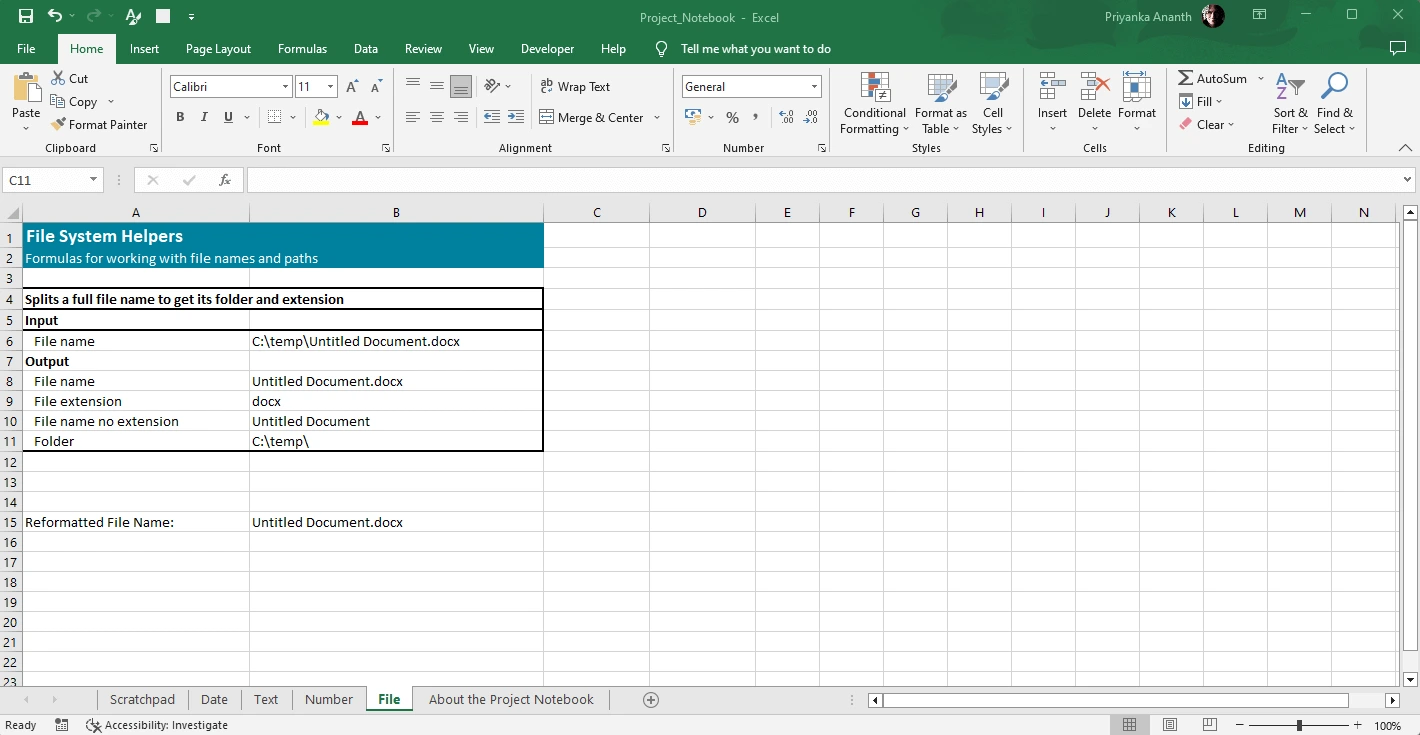
Now to perform configurations, you can open the notebook and open the project notebook.
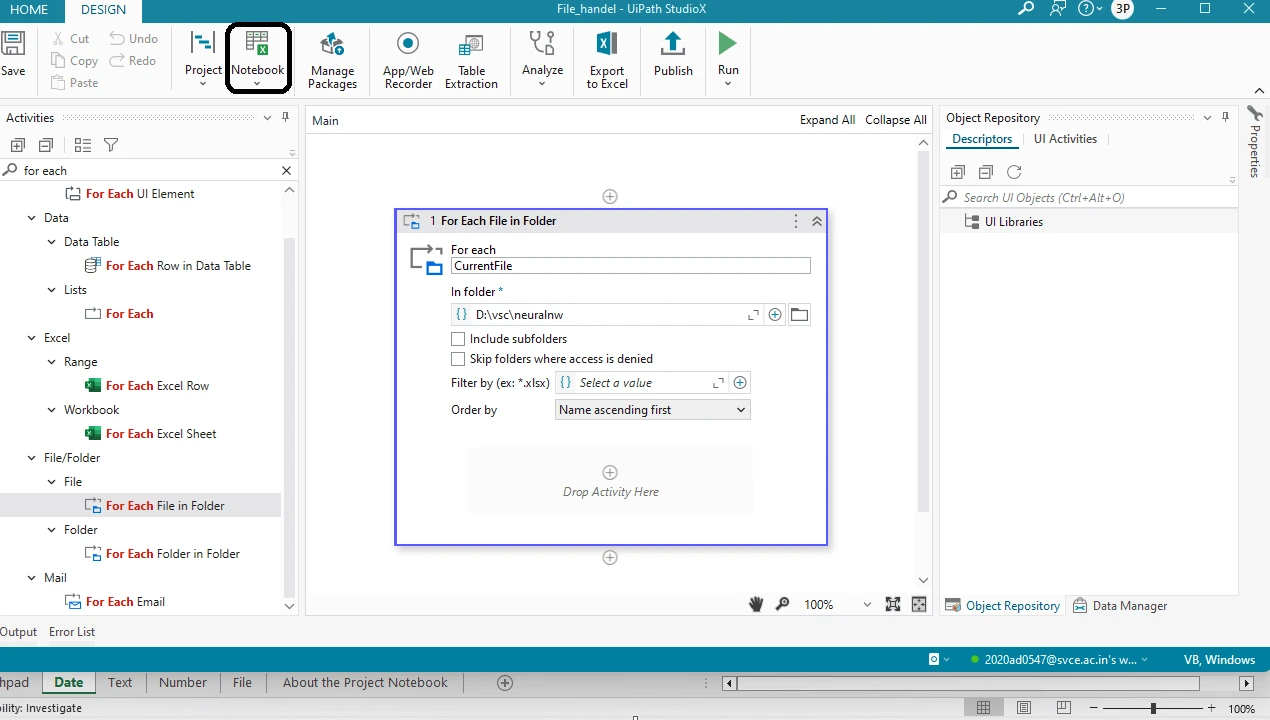
And by that, we can see our project notebook configured and open on our Windows desktop.
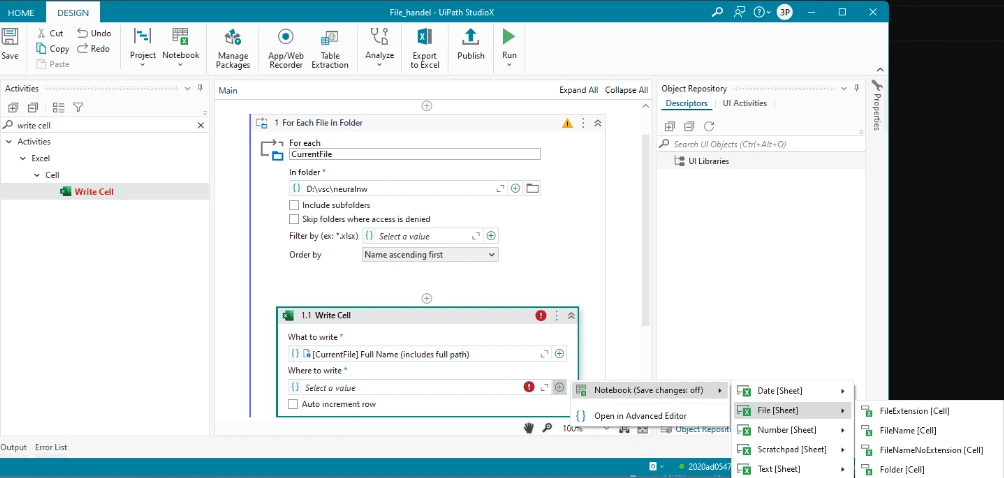
To move the documents from one folder to another, we use an activity called write cell.
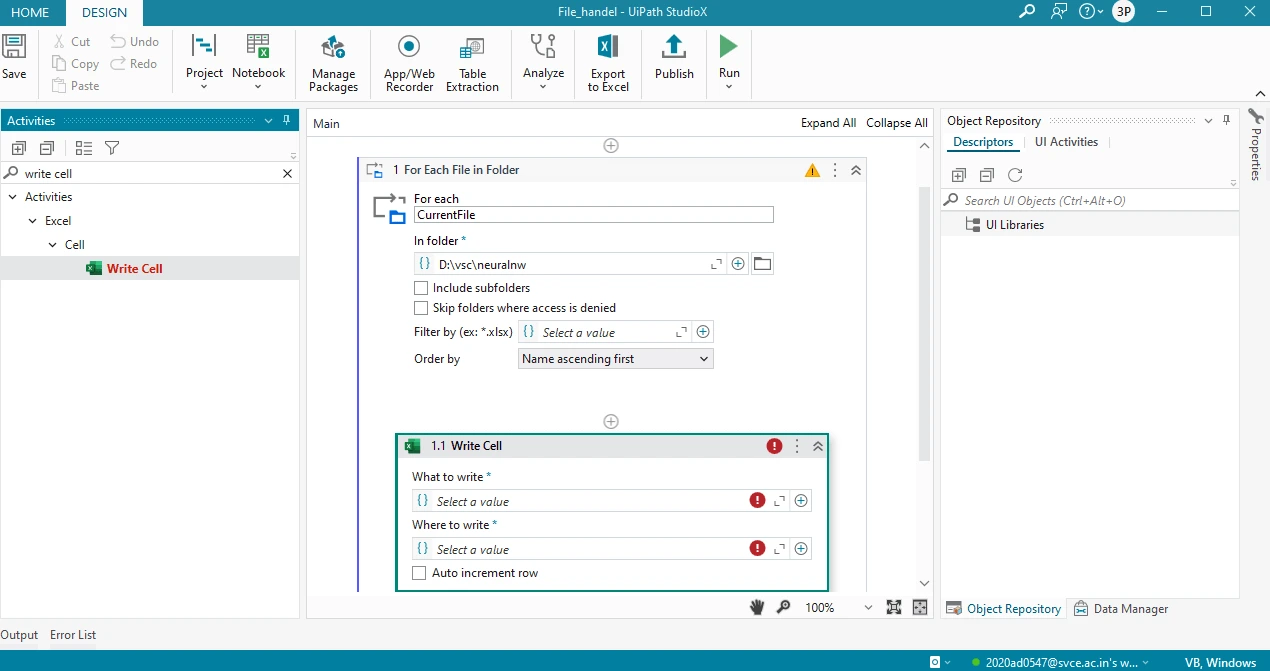
Using the write cell value, we can assign the paths as seen below:
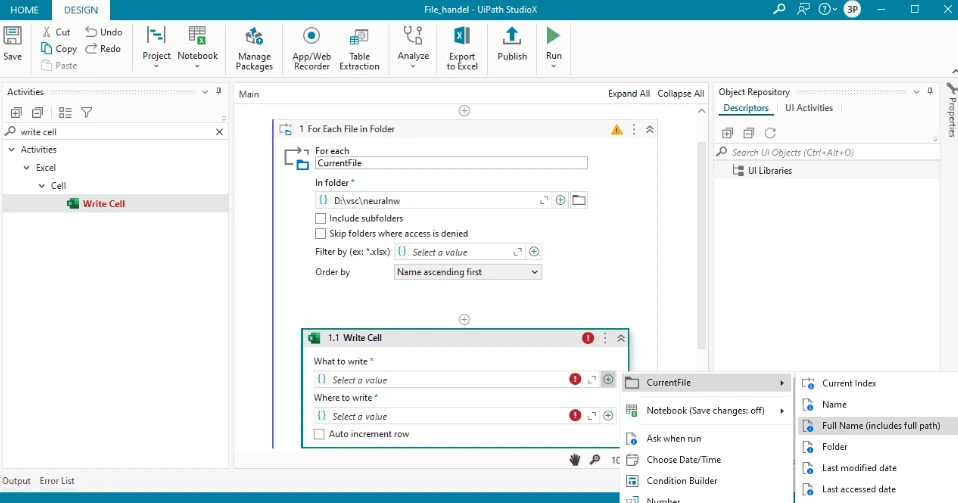
For where to write a column, we choose to change the file name of the project notebook.
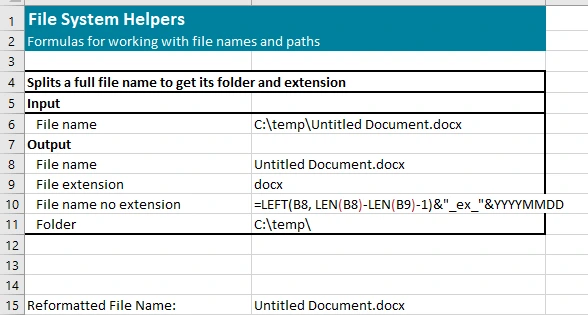
Then, go to the project file in Excel, then change the path values of it for the “File name no extension” row.
Change the Excel value adjacent to the “File name no extension” to the path you want to move your file by typing &”_<filename>”_&YYYYMMDD.
The path values then change. Save the Excel file and close it.

After this, go back to the studio and add the move file operation.
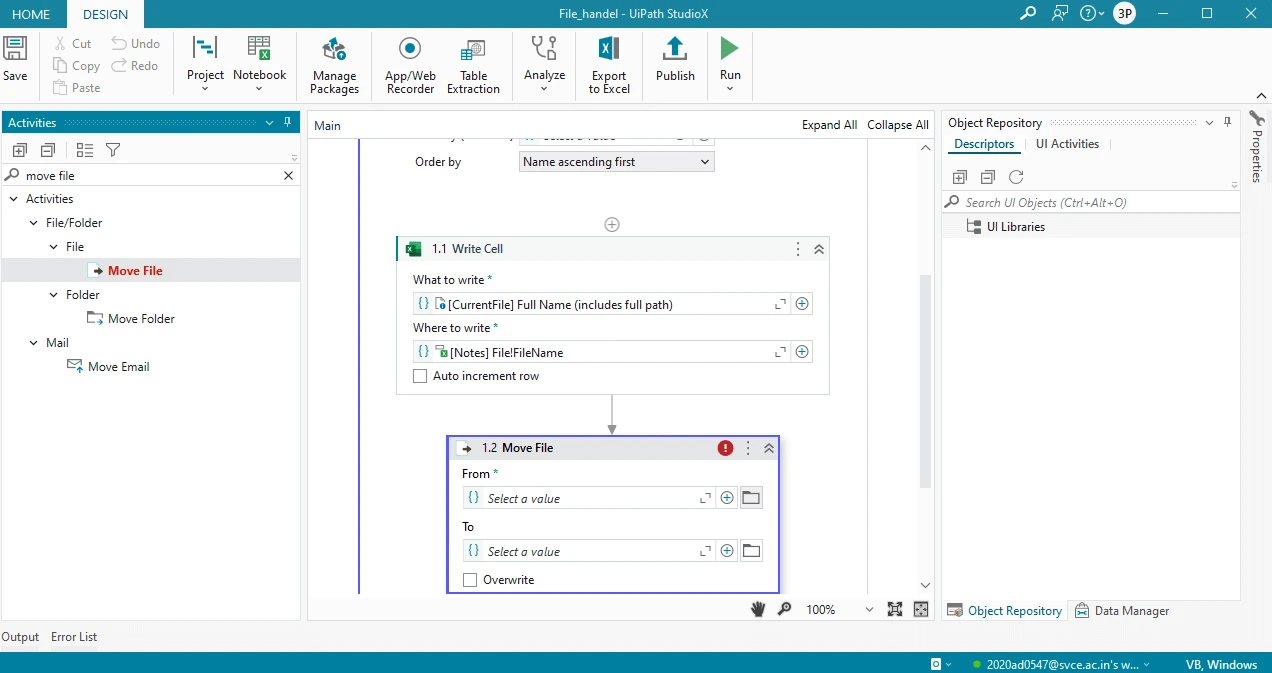
Configure the variables in the Move File UI drag and drop. “From” is configured similarly as seen earlier.

For the “to” path variable, we need to open the advanced editor.
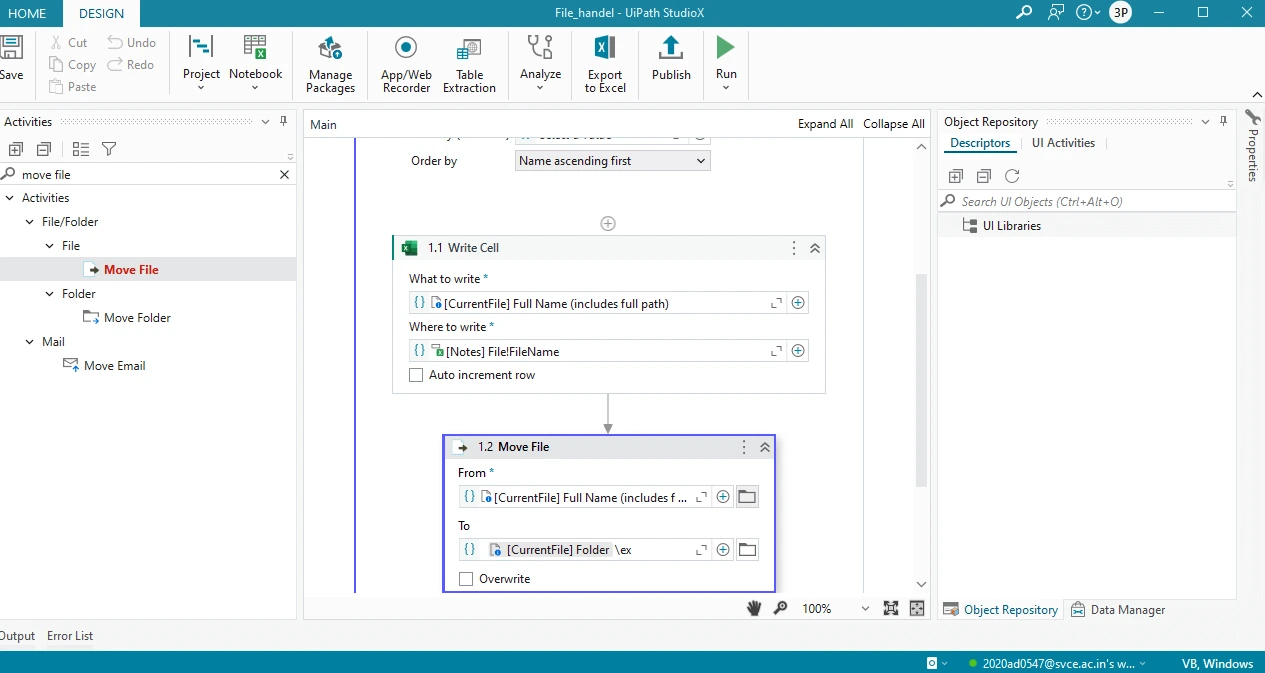
Configure “Folder” then double click to open the editor, where you can write your folder name to be moved to.
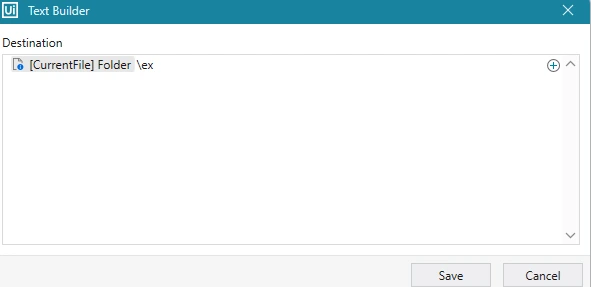
Click save.
Alternatively, simply define the path where all the files should be in. Here, I chose folder ex to send all the files in D:\vsc\neuralnw.
Now run the automation tool
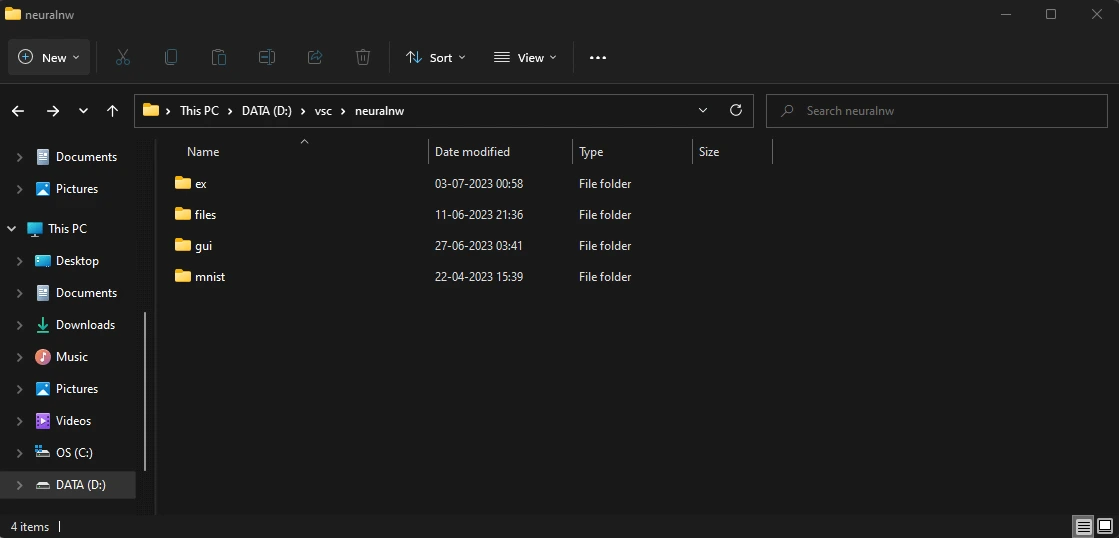
If we go to the folders, we see that all the files have been automatically transferred to the folder we’ve mentioned.
Output
Example- 2: Task Scheduler
Let us see an example where we can schedule mail notifications.
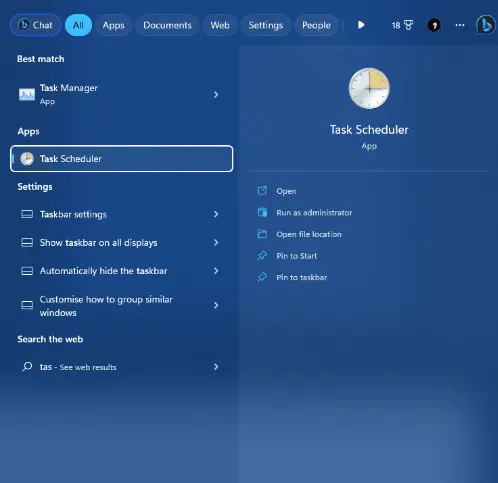
First, go to Windows, and type Task Scheduler. We will integrate it with UiPath to create our task schedules.
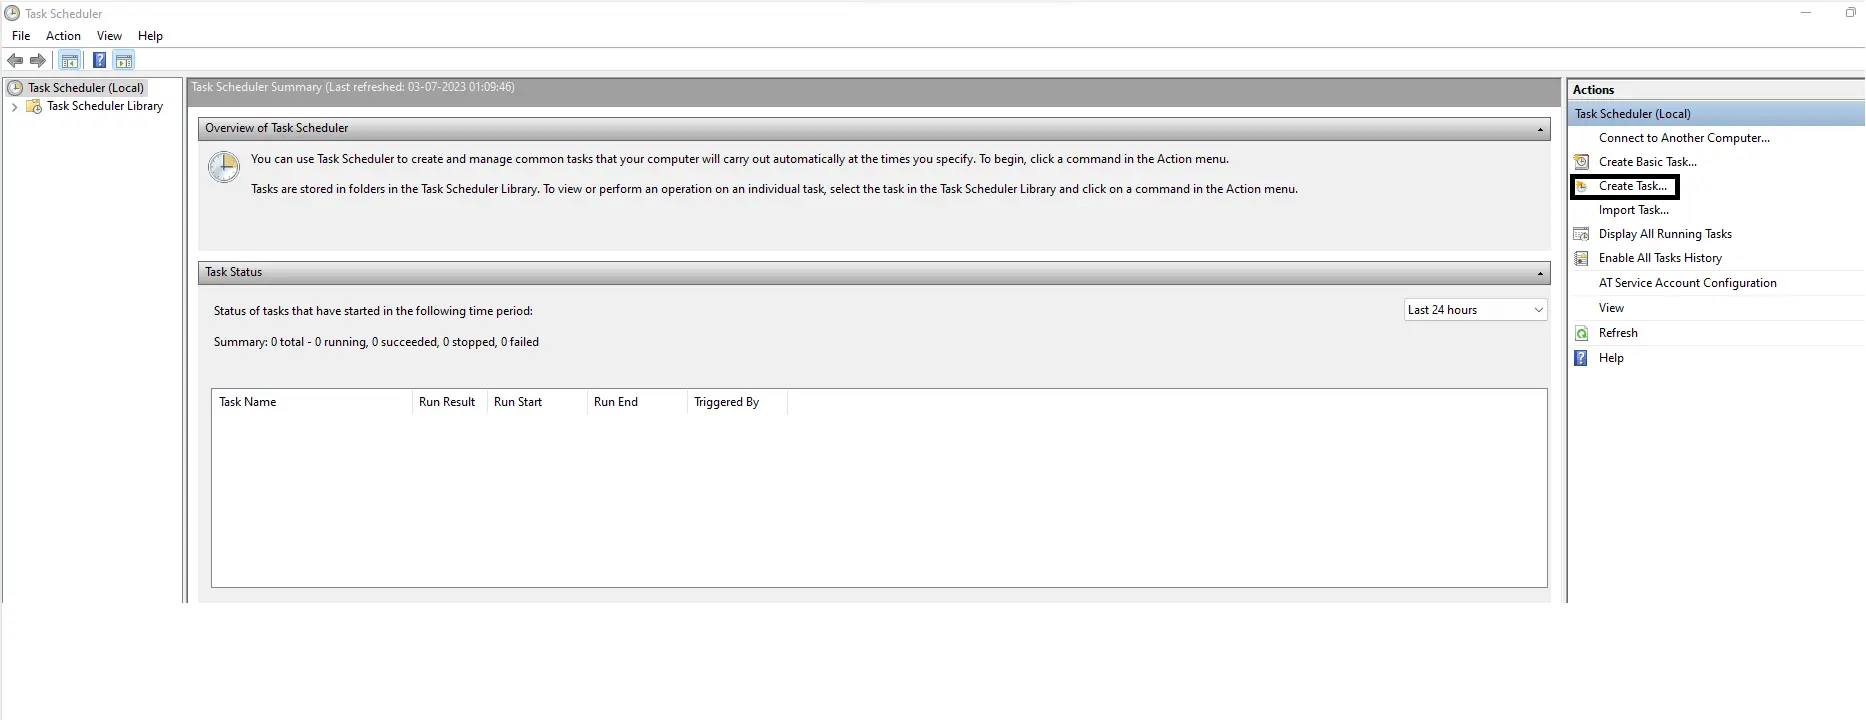
It opens the app as shown below:

Click on “Create Task” in the application.
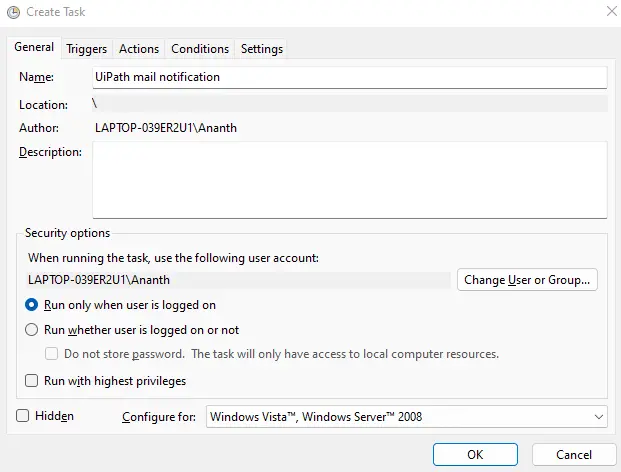
This opens a popup in which you can name your task as:
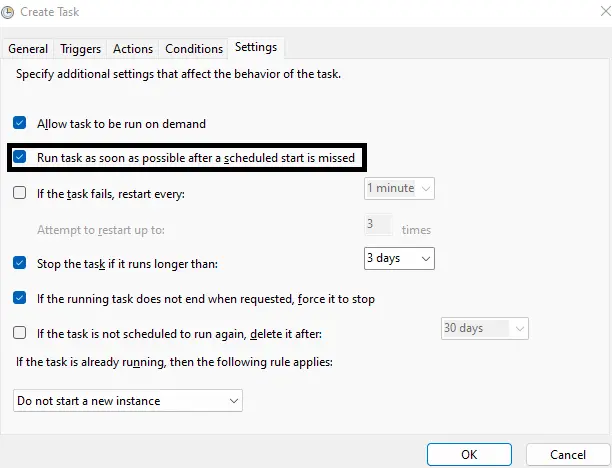
After naming it, go to the “Triggers” section and create a “New” trigger.

This will open a popup where you can configure your settings to your preference.
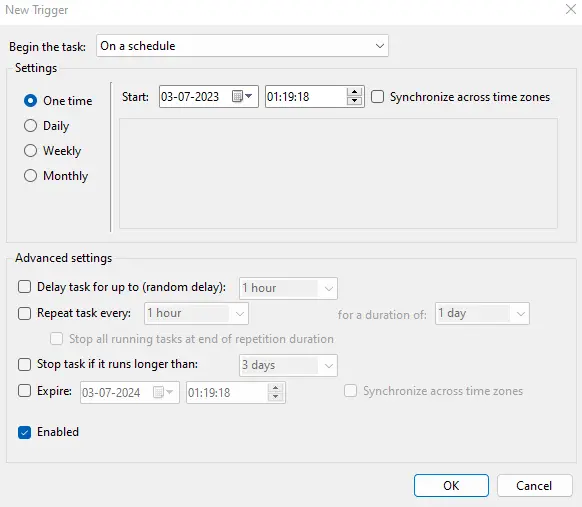
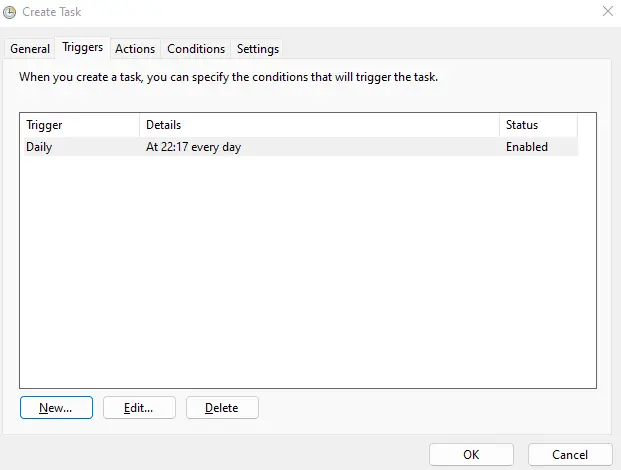
Click “OK” and the popup will close, showing the triggers in the logs as seen below:
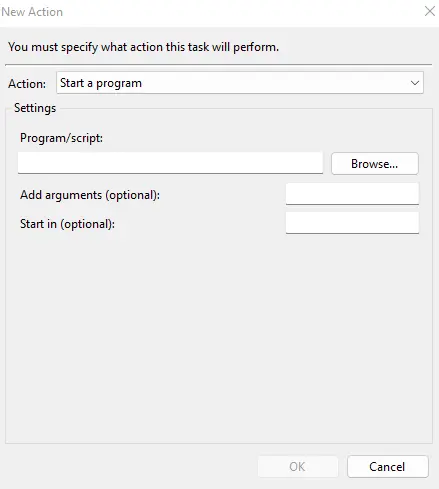
Now, go to “Actions” and create a new task. This will open a popup in which you need to show the path to your scheduler “Main.xaml” along with UiRobot.exe, an application which will be available once you download UiPath studio.
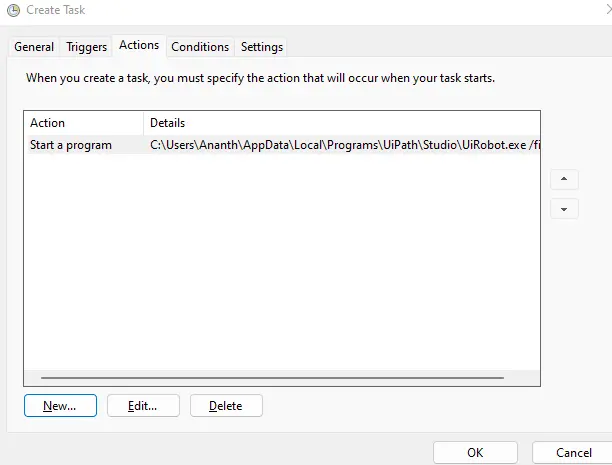
Then, go to the settings and configure it.
Click “OK” and now you’ve integrated UiPath with your Windows task scheduler.

With this, we’ve successfully created a task scheduler by integrating Windows task scheduler with UiRobot extension in UiPath.
Example- 3: Data Mining
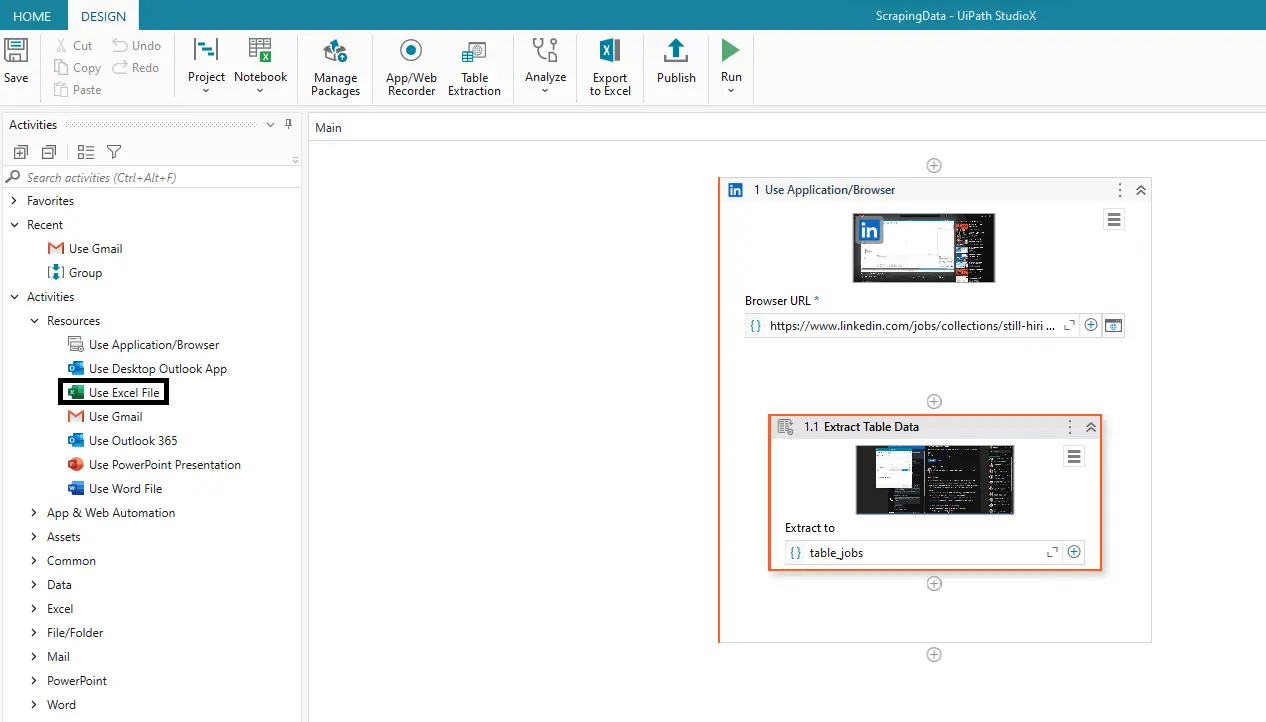
Consider an example where you automatically want to scrape your website for Data mining. Here, we’re going to scrape LinkedIn for available jobs. Let's see how to do that.
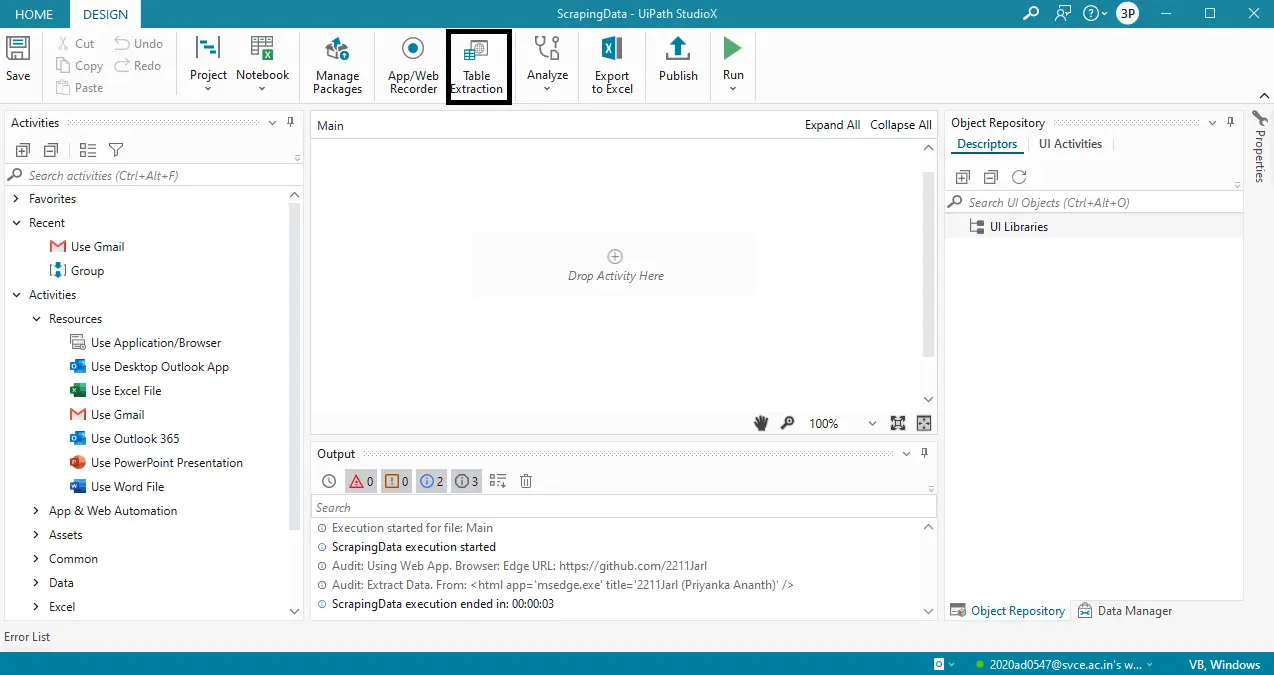
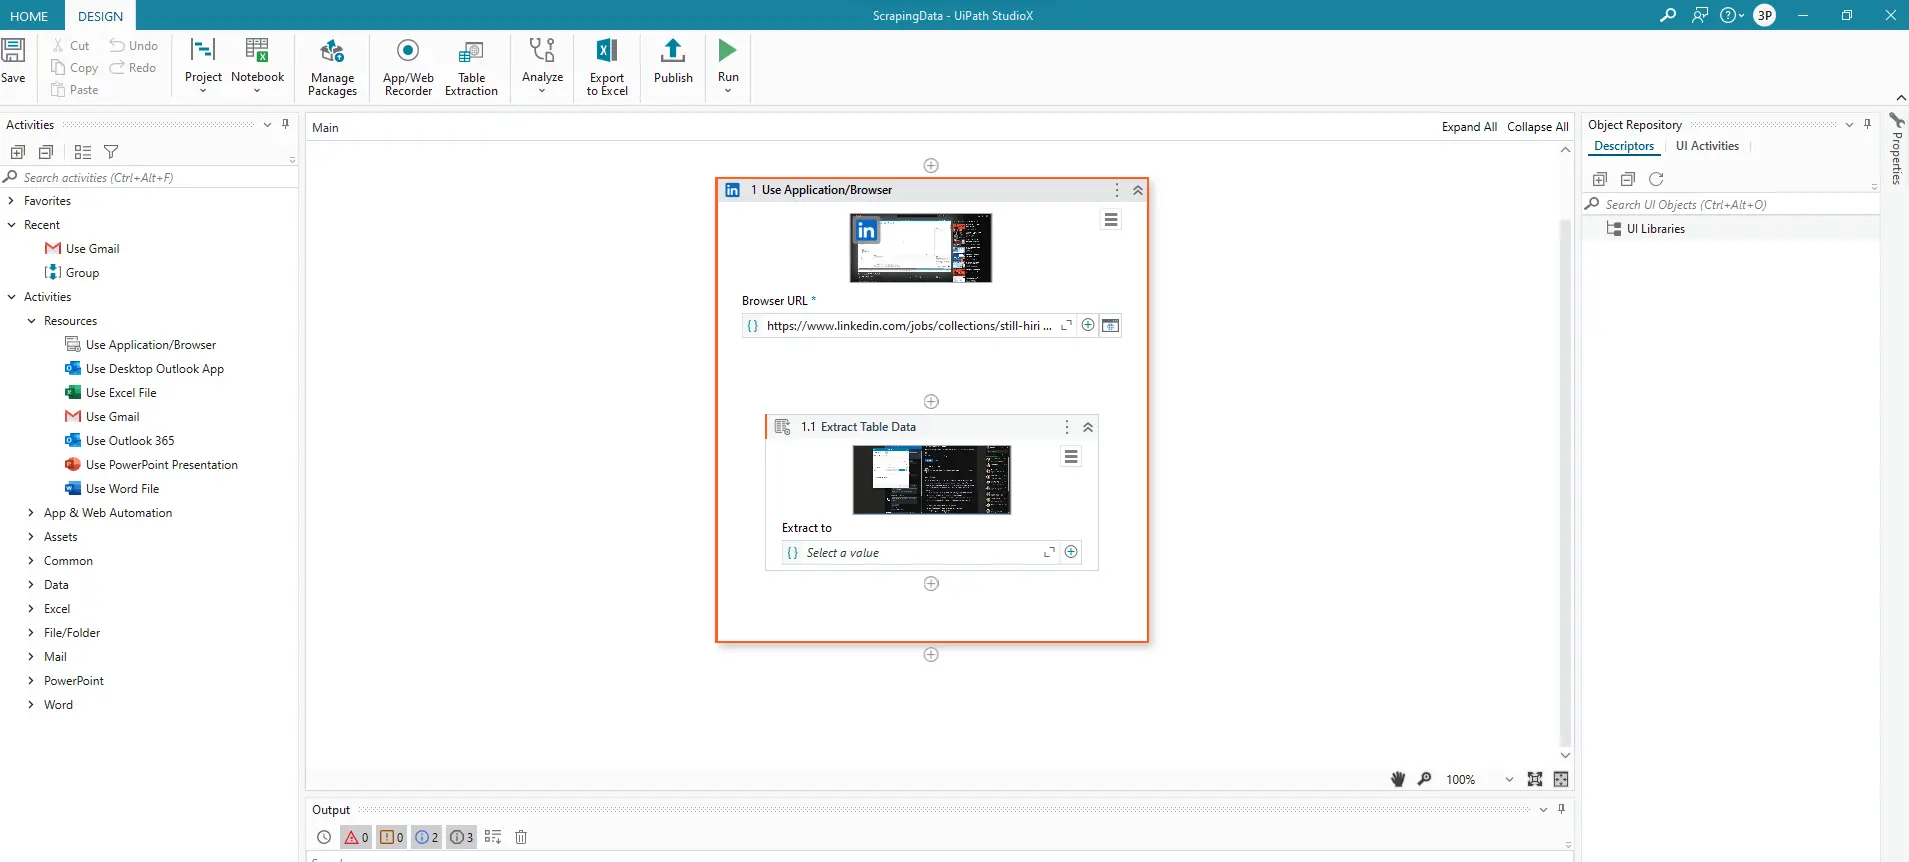
Create a new project in UiPath Studio
In the project, click “Table Automation”
Go to your preferred website to start scraping for data.
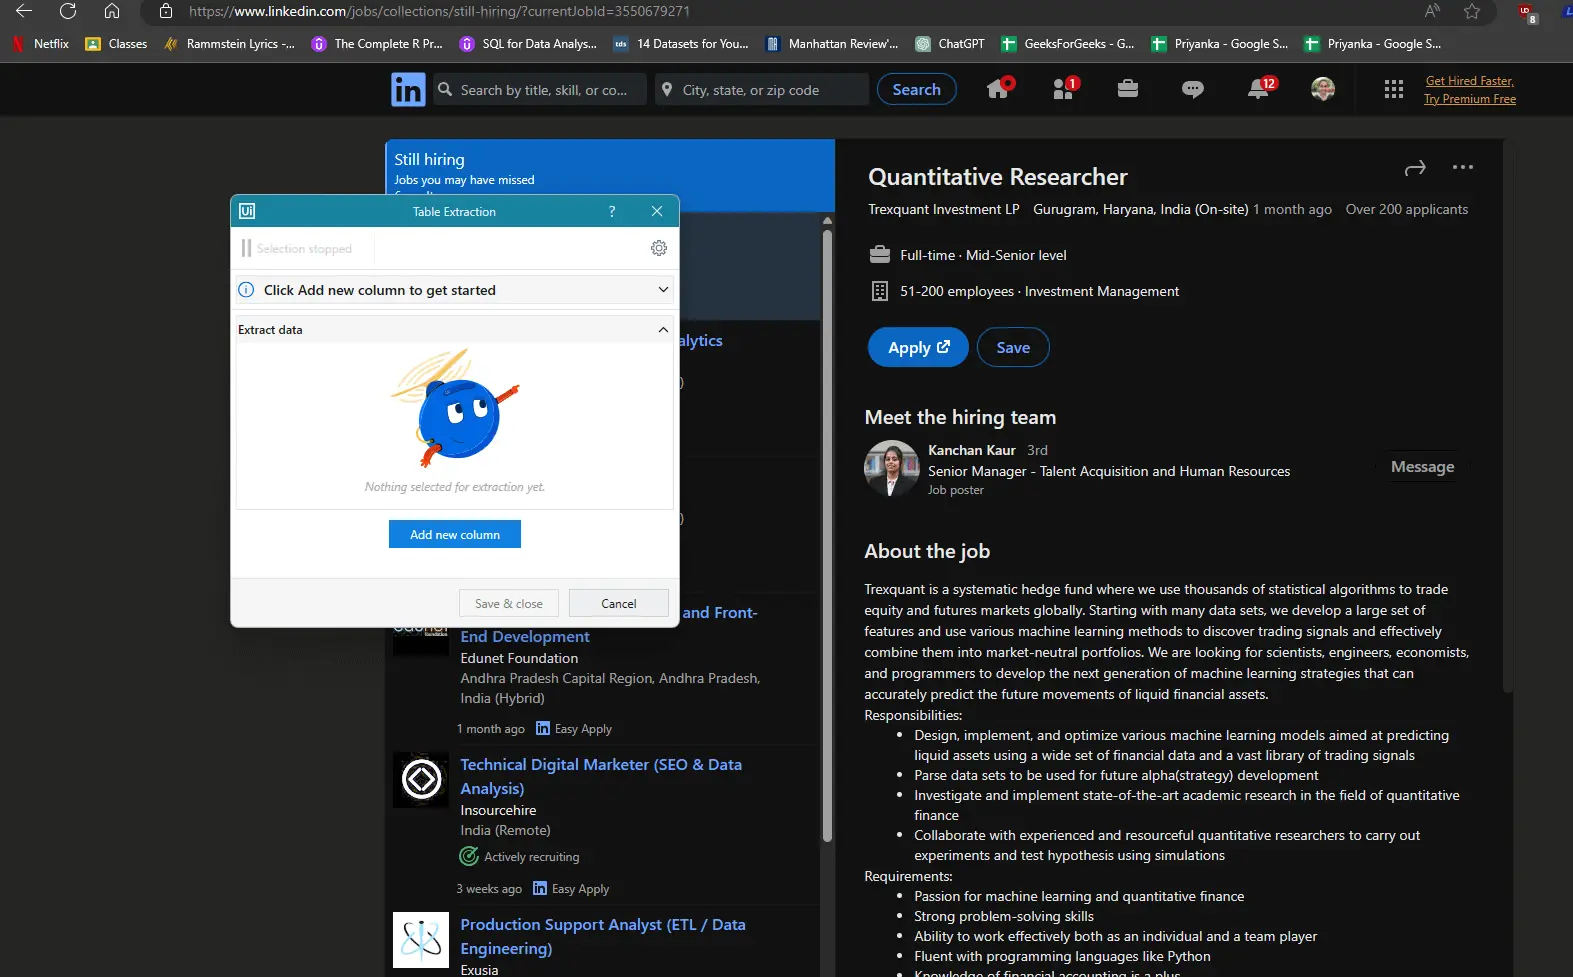
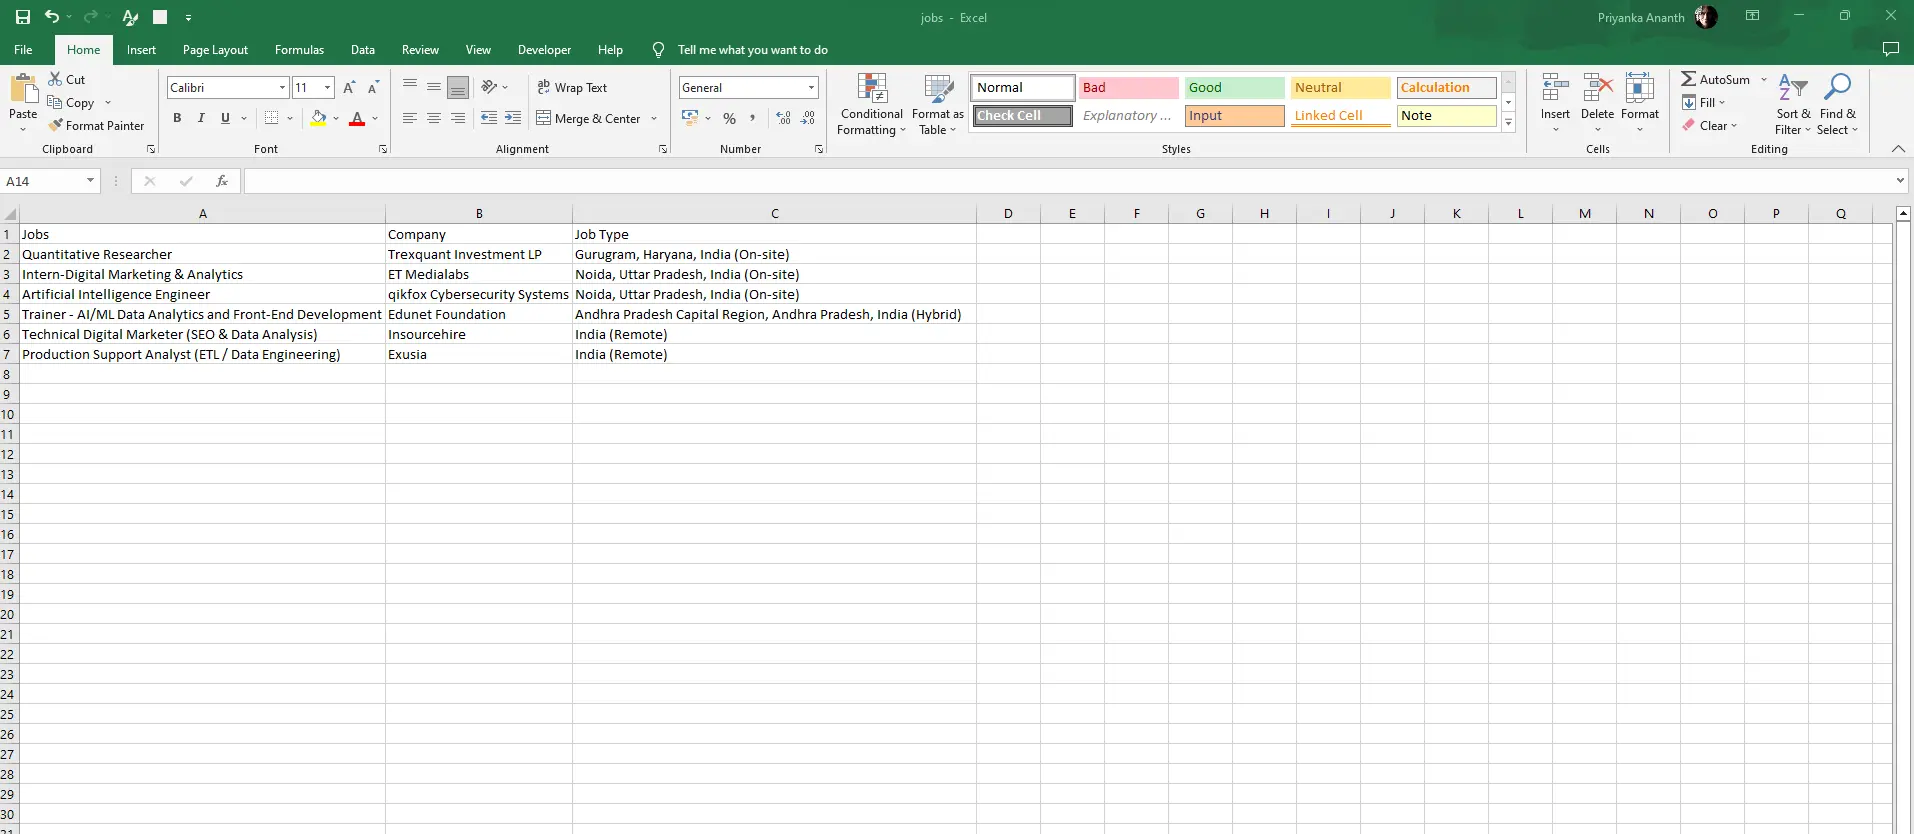
Select the columns you want to scrape. Here, we’re taking the role, company name and location and storing them in an Excel file.
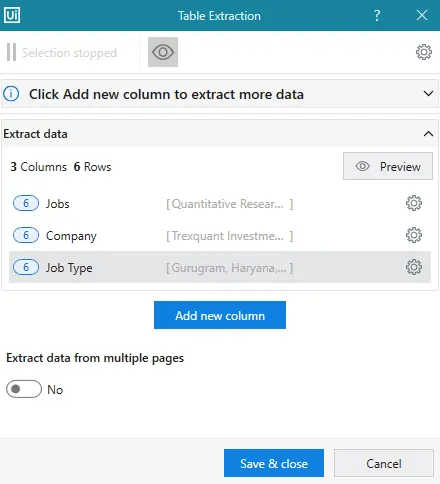
Select the necessary data to extract from the website. Now click “Save & Close”. Going back to the Studio, we can see a process/application being created.
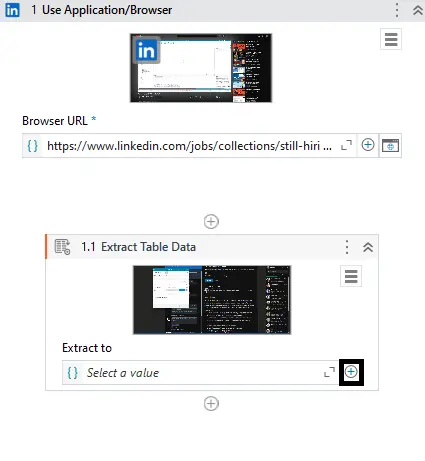
We now need to manipulate the data we’ve scraped into an Excel file. Click the + button in “Extract properties”.
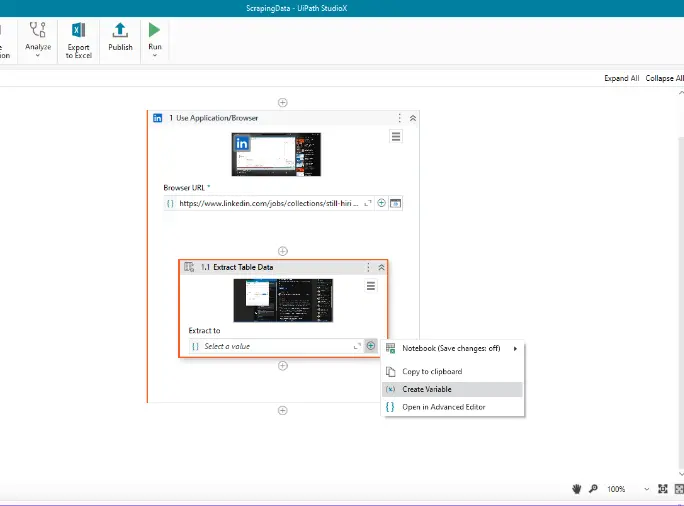
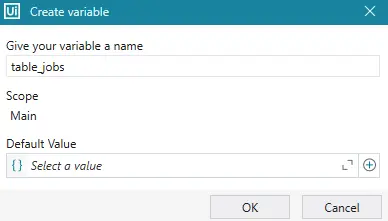
Create a variable to store the values.
Name the variable you’ve created.
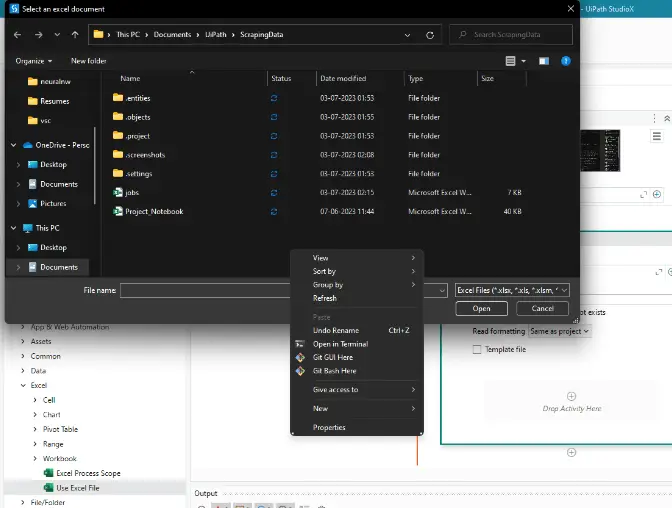
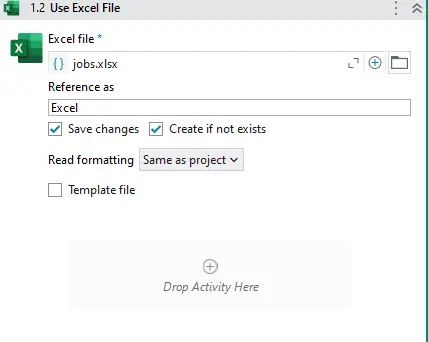
After creating the variable where our data will be stored, click “Choose Excel File”.
Click the “Browse” icon and create an Excel file called “jobs.xlsx”.
After creating it, click the file. The changes will be reflected in the Main.xaml file of the project.
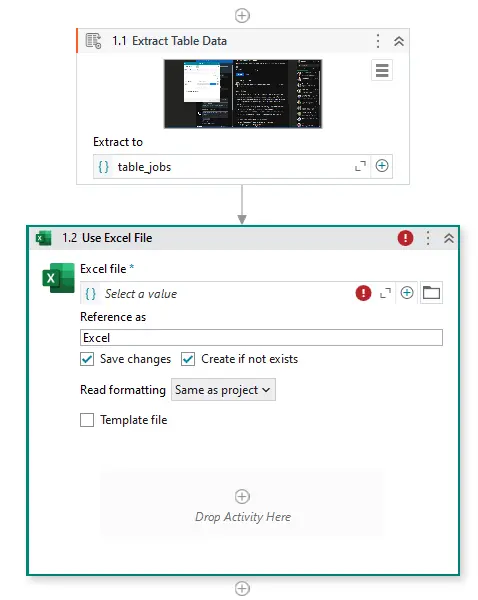
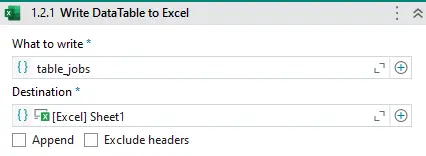
After configuring the path, drag and drop the feature “Write DataTable to Excel” which will print the values stored in the variable created earlier. Simply drag and drop it into the Excel box.

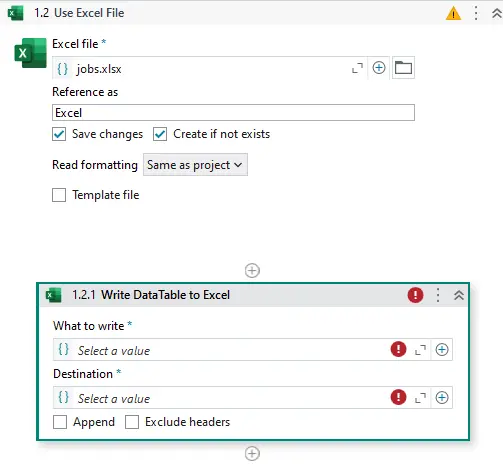
Configure “what to write” as the variable “table_jobs” which was declared earlier and the Destination as the “Sheet1” file in the Excel file mentioned earlier.
After this, run the program to append data in the Excel file “jobs.xlsx”.
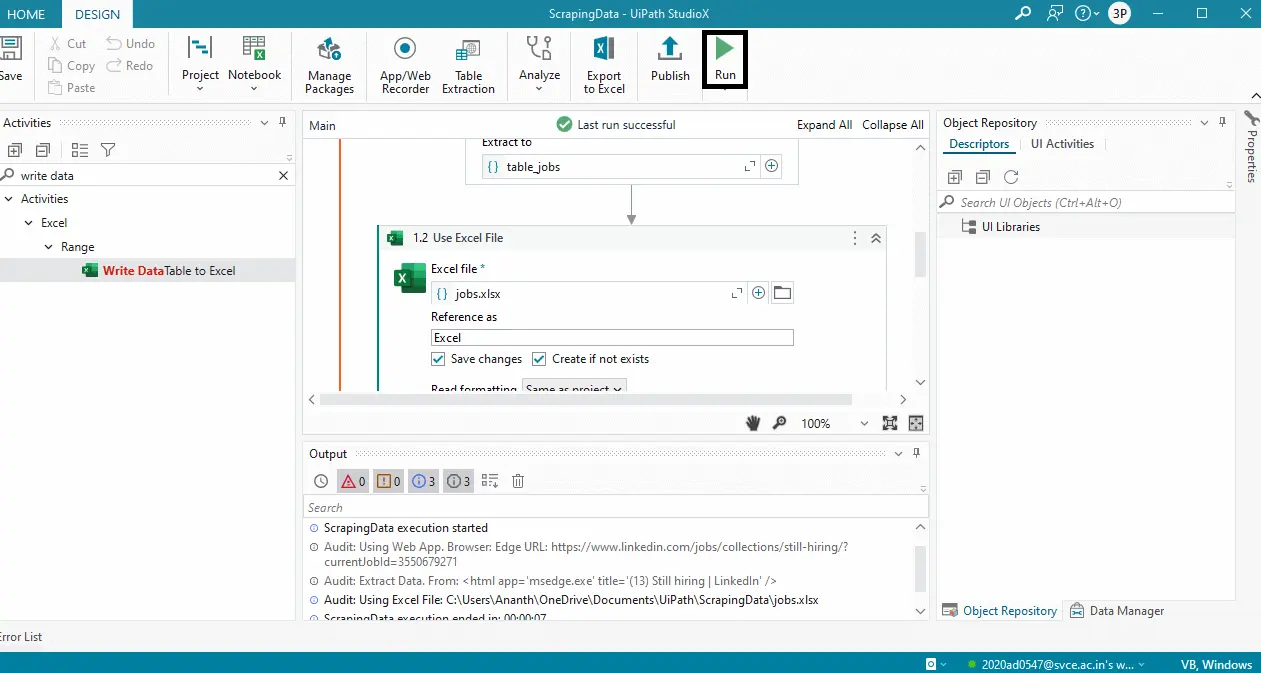
After running the program, open the Excel file in which the data which we’ve scraped has been stored.
Output:
Thus, we’ve seen an example where we can automate the mining of Data, and store it in files where we can process it for further analysis.
Example- 4: HR On-Boarding Process
This is used to Automate tasks such as Employee management where tasks such as generating offer letters and setting up user accounts are all done automatically. This can be implemented in UiPath as shown below:
Step 1: Create a new project.
Step 2: Go to ServiceNow and integrate it with UiRobot.
Step 3: After creating the employee credentials, we submit the request, that is, the data we’ve input to automate logging in emails and so on. The UiRobot will automatically generate passwords for the user and create credentials for the specific business based on the parameters specified by the employer.
After the bot reads the request, it identifies the job with a unique identifier also known as a ticket number. Using APIs the credentials are created in an Active Directory which can be pulled by the bot.
Step 4: After the automation process is done, the ticket present in ServiceNow will be automatically closed.
After this, check the active directory of your remote business directory and the new employee details will be added almost instantaneously.
Example- 5: Integrating Machine Learning
Consider an example where you would like to perform a sentimental analysis on reviews of a product. UiPath has the option to load Python script into the Studio application and utilize it on data.
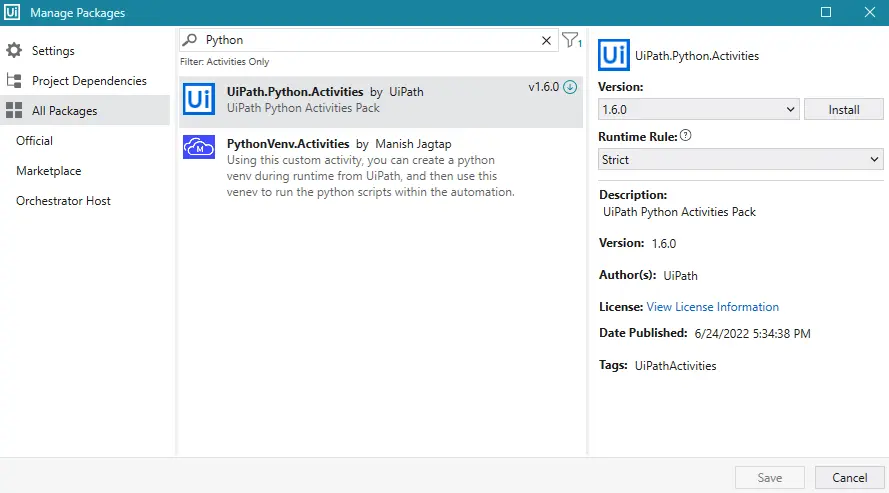
To do so, we first need to create a new application process. After doing so, go to manage packages and download the Python Activities pack.
Create a Python file with the model implemented. Here, we’ve used logistic regression to classify reviews into positive or negative views using the Python code shown below:
model_script.py
from sklearn.feature_extraction.text import CountVectorizer
from sklearn.linear_model import LogisticRegression

# train data
texts = ["I love this product" , "This is terrible" , "It's amazing" , "Not satisfied" ]
labels = [ 1 , 0 , 1 , 0 ]

# text preprocessing
vectorizer = CountVectorizer ()
X = vectorizer.fit_transform ( texts )

# model training
classifier = LogisticRegression ()
classifier.fit ( X, labels )

# Sentiment analysis
new_texts = ["This is great" , "Disappointed with the purchase"]
new_X = vectorizer.transform ( new_texts )
predictions = classifier.predict ( new_X )
print ( predictions )
Save the file as “model_script.py” in your UiPath workspace folder.
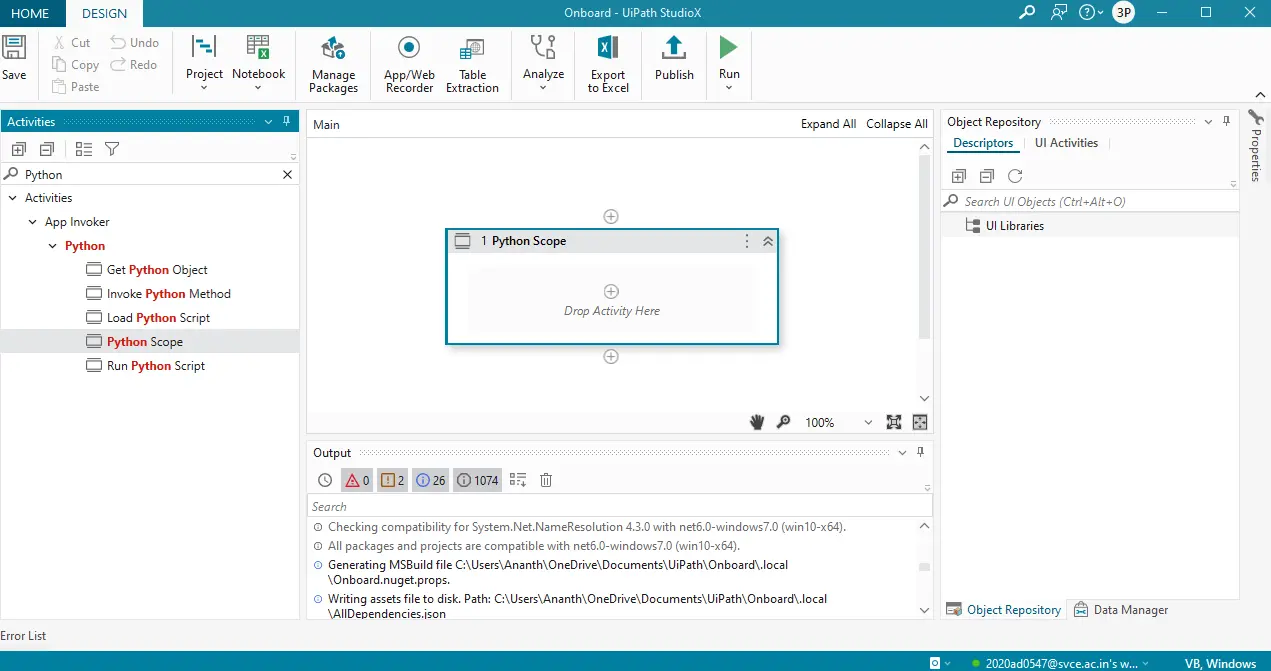
Declare the scope of the Python application present in your system to UiPath.
After defining the path of the Python compiler on your desktop, we can run the program via UiPath.

Output
This will print the output
[0 0]
Example- 6: Citrix Automation
Consider an example where you would want to replicate a process. This can be done by Citrix automation. Citrix is a virtualization technology which provides the means for users to access their desktops or applications remotely. It is basically a way for the user to handhold the robot into performing the task and then automate it when the time comes or when the code is run. Let’s see how to do that below:
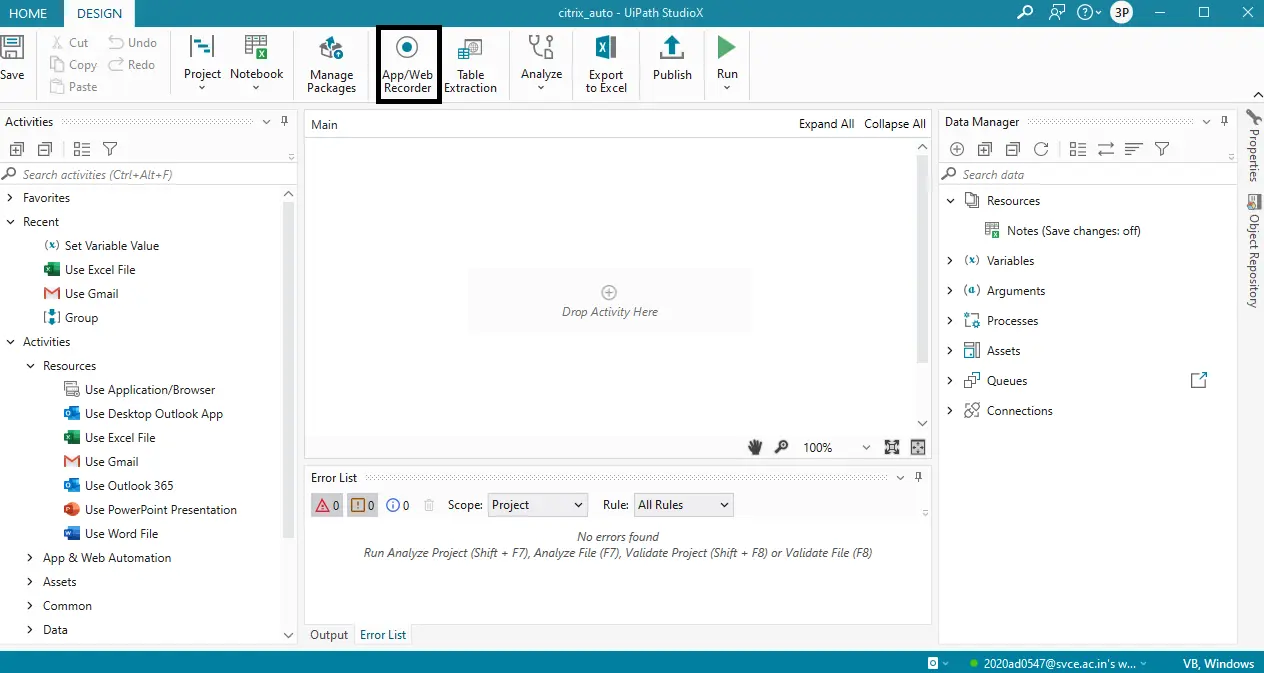
Create a new project
After creating a new project, click the App/Web recorder. This has the Citrix recorder built-in default.
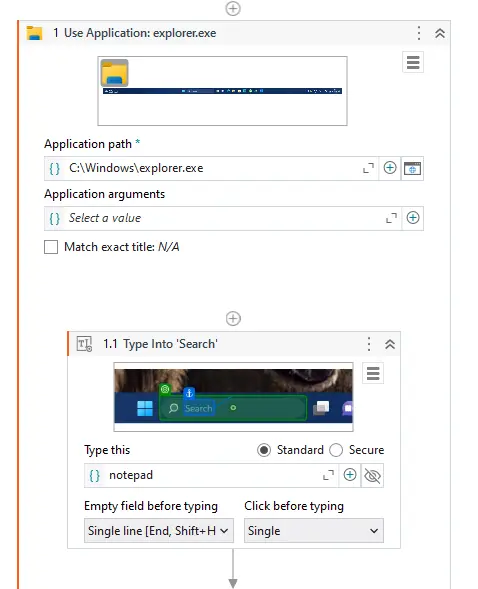
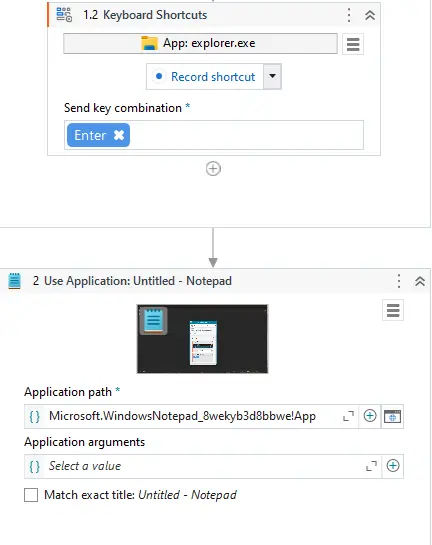
With that, record yourself opening a notepad. Make the recorder accept the value “notepad” when you click the search button which will then open Notepad.
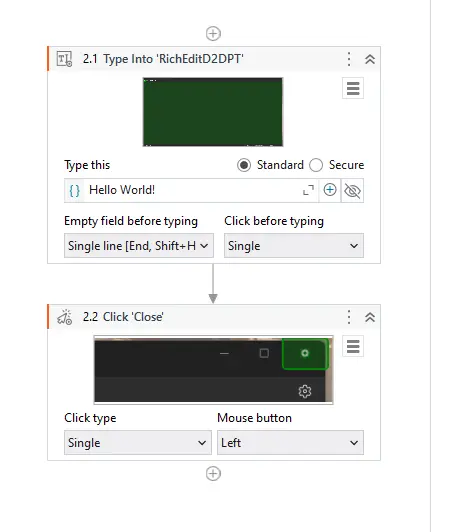
In that, type “Hello World” and then close the window. All these elements are recorded by the Citrix recorder. Then stop the recorder and save the process. Then go back to the studio to see how it's mapped out in UiPath. In UiPath all the tasks are displayed via a flowchart, hence it is easy to follow what processes we have performed and even go back for error checking.
This is the flowchart that the Citrix recorder has recorded for us to automate it. After our process is completed, we can run the UiPath module and see our Citrix automation example come to play.
In this way, Citrix automation can be performed.
Future Scope
With the advent of AI technology, there is a greater demand to automate most of the tasks especially when it comes to dealing with real-time data here. UiPath will become a useful if not essential skill to learn in the upcoming future. Eventually, most of the processes will become automated save for specialized skills. Learn more about by enrolling in our UiPath Training Program.
Conclusion
From the above examples, we can see Automation Examples Using UiPath can be integrated with other services to automate tasks. But, since it's a new technology and there’s not a budding community out there, it sports quite a learning curve. But when you learn UiPath, it simplifies all your tasks, simple or complex with only a few clicks. We can also see the variety of use cases when it comes to automating tasks.


Course Schedule
| Name | Date | Details |
|---|---|---|
| UiPath Training |
19 Aug 2023
(Sat-Sun) Weekend Batch |
View Details |
| RPA Training |
26 Aug 2023
(Sat-Sun) Weekend Batch |
View Details |
| Blue Prism Training |
02 Sept 2023
(Sat-Sun) Weekend Batch |
View Details |
Looking For 100% Salary Hike?
Speak to our course Advisor Now !


